Has your Gunnera manicata exhibited some superb, huge and towering leaves all summer? Well, it’s high time to protect it if you haven’t already! Why, when, how, we tell you everything!
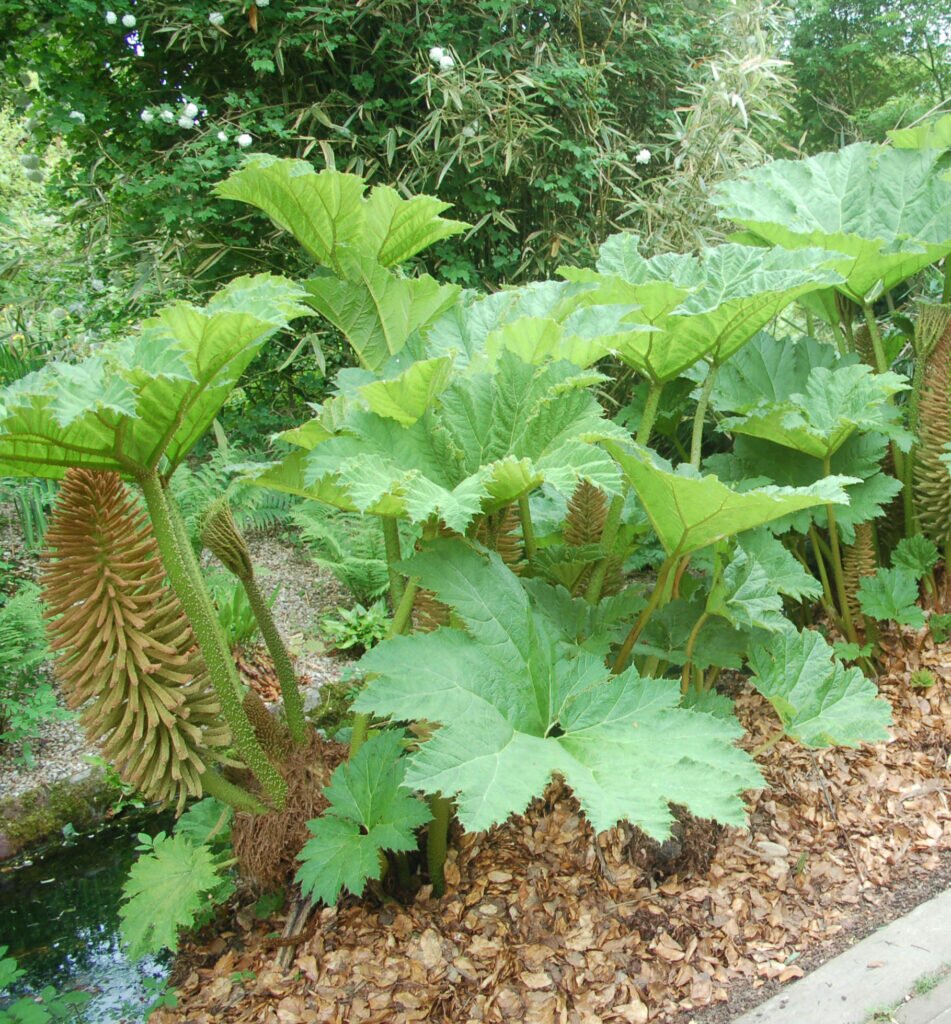
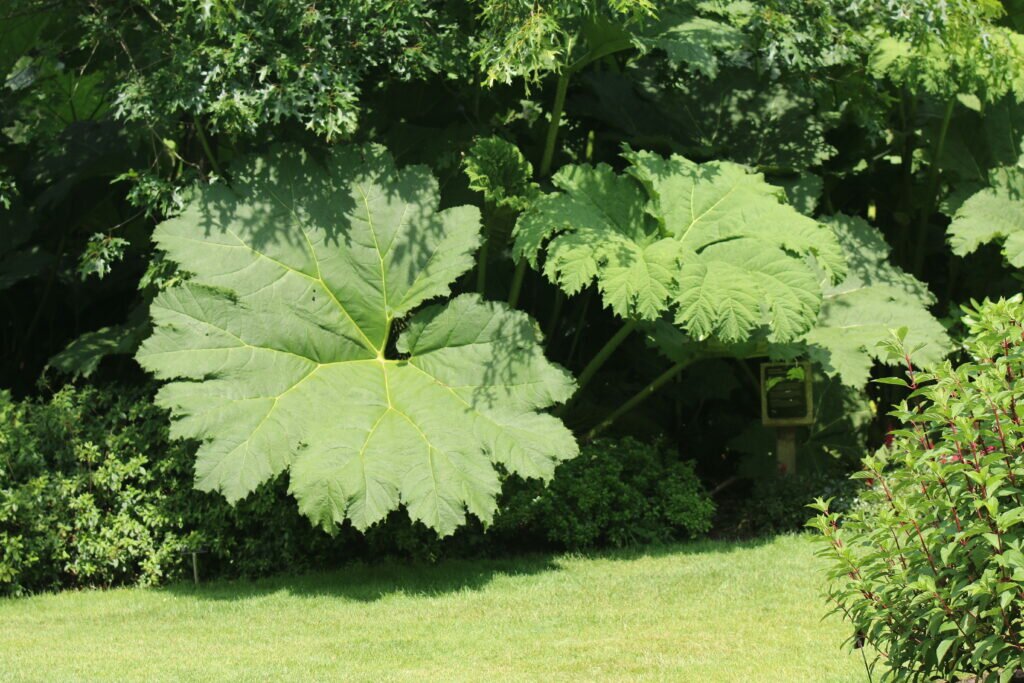
It struts all summer long with bodybuilding foliage … but at the slightest kiss it shivers and it catches the flu! Yes, the Brazilian Gunnera is a fragile little creature that deserves attention in winter, otherwise it will not be able to enjoy the spectacle of its large lush leaves the following year. It is therefore at this time, before the severe frosts of January, that the beast is protected from the cold.
Step 1: We cut the leaves
First cut all leaf stems (petioles) flush with the bud to expose the central bud of the plant. Use a machete, or failing that, a secateurs to cut the petioles. Don’t forget to bring gloves, the petioles are stinging!
Step 2: Protect and pamper the bud
What to do with dead leaves that accumulate in the garden? Thermal protection for the Gunnera of course! Place a large layer of dead leaves at the foot and above the bud. Do not hesitate to cover the bud with at least 30 cm of dead leaves. It may seem thick but keep in mind that they will settle down during the winter. And it is this large bud that ensures the sustainability of the plant. If it is damaged by frost, the plant will die or start again with great difficulty (and will die the following season). So don’t skimp on the thickness of dead leaves. If you don’t have dead leaves, straw, linen chaff, or wood chips will do the trick.
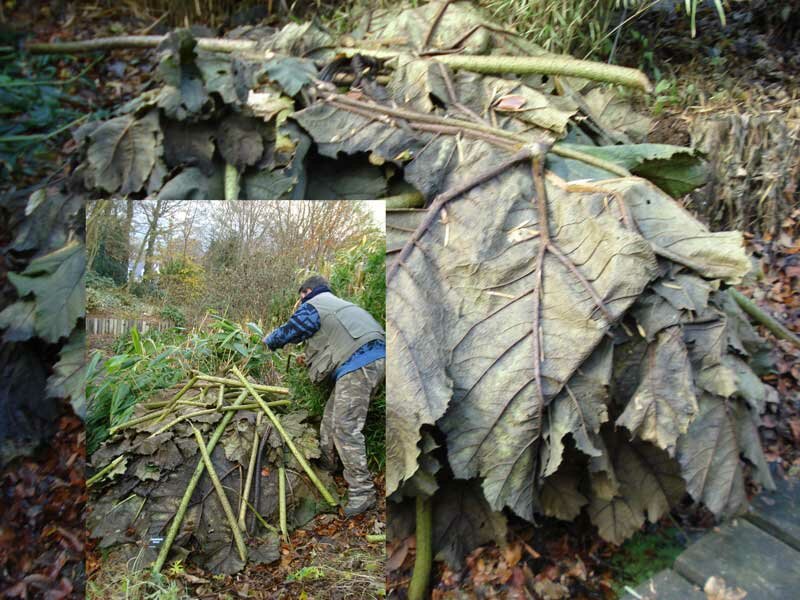
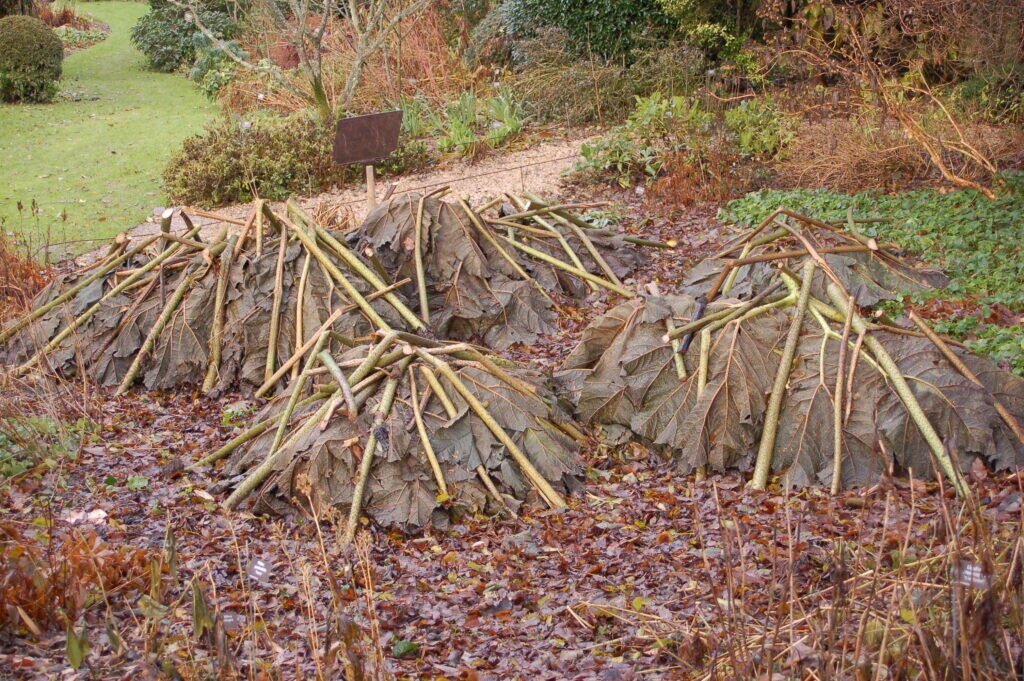
Step 3: We cover and on a leash rest all winter
The leaves of the plant that you have pruned to close serve as protection against moisture. Cut them back by separating the leaf blade from the petiole. Place the limbo upside down on the protection, they will protect from the rain and limit the degradation of dead leaves. Then finally, place the very heavy petioles on the whole to hold and stabilize against the winter storms!
Step 4: We don’t touch anything!
It’s stupid to say but it is when the end of winter arrives that we are tempted to remove all these dead leaves to make the plant “breathe”. We even see new shoots coming out so why not free them from this gangue of old ugly leaves?
Removing the protection when the plant starts up again is the best way to damage or even negate the protection work done before winter. The heat given off by the decay of dead leaves + the days that lengthen = an early stimulation that pushes the plant to produce its new leaves and even when the morning frosts persist. Young, tender leaves develop in a warm cocoon and harden as they elongate and reach the surface. As a result, they come out earlier but are acclimatized and better armed against late frosts. So leave the protection in place until May, the dead leaves will continue to degrade and provide all the necessary nutrients that will allow excessive growth of the foliage of your Gunnera.